Growing up one of my favourite things that would come out each Christmas was this red book my mom had and it had a section where you would put photos from each Christmas. And of course my mom had our family pictures, or our Santa photos or our larger family get together photos. I LOVED looking back on these. And so documenting even just a few memories from each Christmas and pulling those at Christmas time is something I wanted to continue.
In my January newsletter I mentioned that I would share my process of putting together my 2021 Christmas album - so here is part one.
In previous years I have done an assortment of styles of document Christmas. A few years ago I did a project called December Daily and documented each day. I'm thankful to have these albums but they are a lot of work! I haven't scraped the previous three Christmas as I wanted to do them in the "perfect way" which I found overwhelming. So to get those done quickly I will be using the Project Life app and digitally scrapbooking them and put them into a photo book. (I will try to share the finished project!)
So this year being our first with Faith I thought a different style would be fun. I will be using the 6x8" Album and assorted page protectors that Stampin' Up! offers.
1. To start the process I collected all my photos that are Christmas specific between November, December and January and put them into a separate folder. I use my iPhone for all my picture taking, storing and editing. I also use my laptop for editing and printing via Photoshop Elements.
2. I went through all the photos and jotted down the main stories I wanted to capture. For example visiting Santa, our new ornaments, making cards, etc. And of course the typical family events, Christmas Day, etc. There were a few things in December that I knew I would scrapbook in other albums so I am not including those. For example Faith's birthday was on Dec 5 and we finalized her adoption in December.
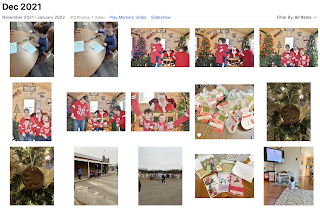
3. Once I have a list of the stories I go through and decide how I want to lay out each story. I know the specific size of page protectors I have, plus I will be using the 6x8 page protector to create a typical layout with multiple photos. I will also use the Project Life app 6x8 templates for some different layout styles. Below images show a few screen shots using the app.
4. Now that I have the pictures and story ideas I open up a blank document on my computer and type out the journalling. I don't worry about length for now, instead I will wait to see how I will include the journalling for each story.
5. Next I go through my supplies and create a kit. I pull pattern paper, embellishments and stamp sets that I want to use and put them all into one or two containers to keep it all organized. With bigger projects like this I want to cut back on the options I have. I try not to go outside of this kit box.
6. Now it's time to print the pictures. There are multiple ways you can do this. But right now with COVID and not wanting to go anywhere or wanting to pay for shipping I am using my home printer and glossy photo paper. I am thrilled with my current printer and the ink subscription I have. If you want to know more let me know and I could do a separate post.
Now I ready to dive in and start assembling. Come back next week for part #2 to see how I do that.


I love your process - so methodical and it makes sense! Thank you for sharing!
ReplyDelete